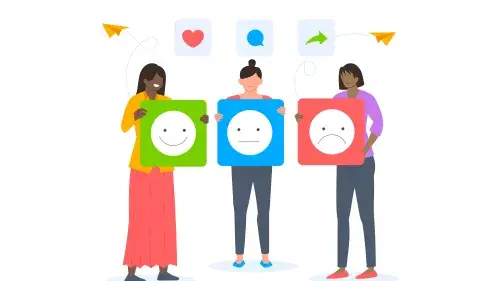
Usability testing is a way to learn how easy or difficult it is for people to use something by observing them actually using it. The resources provided in this kit can help you systematize the process, produce reliable findings, and generally expand your ability to test service materials (i.e., paper and digital forms, mobile applications, web pages, etc.) thoroughly with real users—before you launch them out into the world.
What You'll Need
This kit covers three different approaches to usability testing. Different approaches require slightly different materials, but these are the basics that will get you started:
- Someone to run the test
- Someone to help observe and take notes
- Someone who might use what you’re testing
- Something you want to test (e.g., a new form, a new interface within an application or website, a new set of instructions or training materials, etc.)
- A quiet place to conduct the test
In a usability test, you show materials to individuals, one at a time. You ask each person to use what you’ve given them, and you watch and listen without teaching or training.
That’s different from focus groups, surveys, and advisory groups, where you might show the materials to groups of people and ask them what they think or how they feel.
Why Do Usability Testing?
Through usability testing, you can learn about what works (and what doesn’t) for users, and you can confirm or challenge assumptions.
With data from usability testing, you can update your website, user interface, or form with confidence.
It will help you:
- Identify problems in the design of service materials
- Make it more likely that people will have efficient, effective, and pleasant interactions with your organization
- Make it easier for users to use your service – whether the users are citizens, employees, or other people your office interacts with
When to Do Usability Testing
You can do usability testing almost any time, but it’s most useful:
- Before you start redesigning something
- While you’re still working on a draft
- When a significant event happens that may cause changes or require staff or volunteers to be retrained
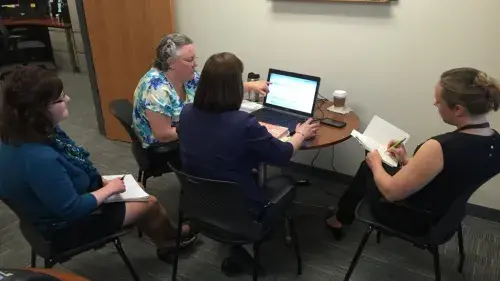
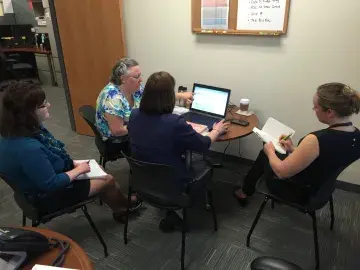
What Does a Usability Test Look Like?
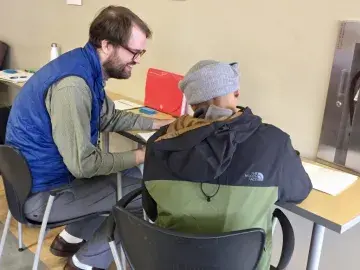
A usability test is made up of one-on-one sessions with one moderator and one user or participant. The- moderator (usually you) will be near the participant to conduct the session and ask follow-up questions (but not to teach or help). A note taker may support the moderator by logging observations and discussion.

During the session, the moderator and note taker collect observations (what you see and hear). Observations give you data that you can use to make judgments about what’s frustrating to users and how you might eliminate those frustrations.
Each participant uses a copy of the same materials. The moderator guides participants through the session, observes their behavior, and takes notes (if possible, which is why you have a note taker). Remember: do not help participants do the tasks.
After the testing part is done, if there’s time at the end of the session, you may help participants learn how to use the materials. They often appreciate knowing what their mistakes were. Correcting participants will help you understand what to fix in the materials, too.
Usability test sessions are usually short – about 15 or 20 minutes – but can go longer.
Consider inviting other people on your team to join in by observing the sessions (but silently).
How Many Participants Do I Need?
Some rules of thumb:
- Try to test at least four people who normally might use the material you’re testing. If you think there might be different behaviors for different types of users, include four of each type.
- Make sure your participants represent a diverse group of users. This means including people with disabilities, different ethnic backgrounds, and differing English language proficiencies.
- Don’t worry about demographics like age, education, or income. Think more about what experience participants might have doing the tasks you want to observe, and simply recruit a range.
- You don’t need a large sample of participants. Don’t worry about “statistical significance.”
The goal is to learn enough in your usability test to make informed design decisions.
How Should I Find Participants?
First, you have to decide if you’re going to schedule people in advance, or if you’re going to use impromptu recruiting by going to where likely participants might be.
If you’re scheduling appointments ahead of time, tell everyone. Use every channel you’ve got to invite participants. If you’re doing quick testing in the field, go to places where your users are, like communities recovering from disasters, airports, land or sea ports of entry, refugee centers, and DHS offices (if users are employees).
Looking for some recruitment tips? Check out this article on how to recruit subjects for your usability tests.
No matter what approach you take to recruit your participants, make sure they fit your criteria of likely users. That means that they currently do the behavior you want to observe, such as applying for immigration status, applying for disaster relief, filling out a customs declaration, and so on.
What Should I Look for During a Usability Test?
You’re looking for both what worked (successes) and what didn’t work (failures). For example:
- Any errors or mistakes – even if the participant corrects them
- Failure to complete or submit
- Places where the participant didn’t follow instructions
- Any signs that the participant doesn’t understand the information or actions needed
- Any errors specific to the material being tested
Behaviors you might see and want to take note of:
- Questions participants ask
- Requests for assistance
- Spoken comments or non-verbal reactions
- Expressions of emotion (confusion, frustration, anger, disgust, delight, satisfaction)
- Any behavior that is adaptive (such as taking out reading glasses or moving in closer to the machine)
- Incidents that would be documented and recorded
- Behaviors or comments that surprise you
- Things that surprise the participants
- Distractions (glare, noise, movement)

Before testing with real users, consider a practice session with colleagues. This exercise will also help you practice note taking.
Since you might not already have materials you want to test, we’re providing a sample: instructions for how to fold an origami rooster. Your goal with the test? To measure the effectiveness of the origami instructions provided.
What You’ll Need
- Moderator
- Three participants
- Paper sheets to make the origami
- Test materials (see below)
Test Materials
To run this test, you’ll need to download the test materials:
Download the Practice Test materials (.zip file, 625KB)
Duration of Test
Not more than 15-20 minutes per participant.
How to Do the Test
Find a quiet spot to conduct three usability tests—one participant at a time. Share the instruction sheet with them along with the paper supplies to make the origami.
Follow the moderator’s guide provided to introduce the participant to the project and guide them through the process. While they’re testing, jot down observations.
After you’ve completed all three sessions of your usability test, use the note taking guide provided to record your top five observations and insights about the usability of the origami instructions, focusing specifically on what you heard and what you saw. In the “additional comments” section, include points of analysis on the closing questions:
- What worked well?
- What needs improvement?
Once you’ve practiced with this test session, you’ll be ready to look at the four approaches to usability testing that we cover here and think about which one best suits your situation and your needs.
Four Approaches to Usability Testing
There are lots of ways to conduct a usability test, and the approach you take will depend on what you want to learn and the amount of time and resources you’ve got.
We’re highlighting four approaches, ranging from quick and easy to thorough and structured:

- Testing in the office: quick usability feedback from colleagues. If you’re in the early stages of designing your materials, this approach is a fast way to get a second opinion.
- Testing out of the office: catch real users in the field. If you have drafts or prototypes that are close to complete, use this approach to test how people use them.
- Testing in the conference room: thorough, structured testing with real users. If you have solid, revised materials, this approach allows you to run a structured test with real users who you’ve scheduled ahead of time.
- Testing remotely by videoconference: expanded testing with remote users. If your users can participate in a remote testing session, a videoconference can be used to observe and record the test. This can be especially useful for testing websites, digital forms, and applications, where the user’s screen can be shared and recorded during the test.
Below, we provide details, guidelines, and materials for each the four approaches.

Use this approach any time you want quick feedback on something you’re developing. Of the four approaches, it requires the least time and resources and usually works best in the early stages of designing new materials or updating old ones. It’s also good exercise if you’re new to usability testing.
Who to Test With
Bring together 2-4 colleagues – but make sure they’re people who know nothing about the material you’re testing. Although your colleagues need not represent your target audience, you can ask them to use personas to think about a user’s perspective. If you’d like some tips on how to use personas, check out this article about different ways to approach a form.
What You’ll Need
- A moderator
- A rough draft (even a sketch) of the new material you’re developing
- Test materials (see below)
Test Materials
To run this test, you’ll need to download the test materials:
Download the Testing in the Office materials (.zip file, 47KB)
Where to Do It
Since it’s informal, you can do this test at your desk, a participant’s desk, or in a conference room.
How to Do It
- Recruiting – Walk down the hall or to the next department to find someone who’s not familiar with the material. Ask the person if they have 15 minutes to spare to do a quick review of the material with you.
- Setting up – If they agree, find a quiet spot to conduct the test. Take out your moderator’s guide as well as the materials to be tested. Using just a notepad or the note taking guide provided, jot down observations and comments.
- Testing – Hand them the sketch or draft design and ask them to use it as a typical user might. Pay attention as they work their way through the material, jotting down any usability issues that come to the surface during the testing.
- After the test – Thank them for their time.
- Reporting – There’s no need to formalize your findings; just use your rough notes on usability issues to revise the materials or start developing a prototype.
Use this approach if you’re looking for quick input on prototypes that people can try out. This test is more structured than testing in the office, but it’s quicker and easier than the testing in the conference room approach.
Who to Test With
Your participants should come from the public, so they’re more like your real users (rather than your colleagues). For example, if you’re testing something for airport baggage procedures, you can ask people if they’re regular flyers who check bags and go from there.
Depending on the time you have available for each session, you can work with anywhere between 4 and 8 participants for this test. You don’t need to pay your participants, but you might consider giving a small token of appreciation—like a promotional item provided by your agency.
What You’ll Need
- A moderator
- A prototype/early version of the new material you’re developing
- Name badges
- Test materials (see below)
Test Materials
To run this test, you’ll need to download the test materials:
Download the Testing Out of the Office materials (.zip file, 134KB)
Where to Do It
The idea for this test is to leave your office and go to a public place. That might be the pre-security area in an airport, a field office, or a community center.
If you have some flexibility with location, find a place where you’re likely to find people who are like your real users.
How to Do It
- Setting up – Set up a table at the location. Be sure to use signs and badges to tell people what you’re doing (“Help us improve our critical DHS training materials!”).
- Recruiting – Wearing your badge and a smile, walk up to someone and ask if they could give you a few minutes to help DHS employees and the citizens we serve. Ideally, you want to find participants who would typically use the materials you’re testing.
- Testing – When they’ve agreed to help you out, have each participant complete the consent form and demographic questionnaire. Then, begin the usability test. Pay attention as each participant works their way through the material. Observe their behavior and make note of their comments as they go. When they’re finished, ask them to tell you two good things about the materials and two things that could be improved.
- After the test – Review your notes and make sure you haven’t missed anything you wanted to observe or follow up on. Thank your participant for their time and give them a copy of the “Thank You” card.
- Reporting – Depending on your situation, you can use your findings to compile a short report or simply use your notes to iterate your design further.
Use this approach if you want to conduct a more structured test with participants who are your actual users—not just colleagues or people- on the street. A full usability test can happen at any stage in the process, from testing the original version, testing drafts, or testing the almost-final version. This approach may or may not result in a formal report.
Who to Test With
For this test, select participants who represent the intended audience for the material being tested. Screen them through phone conversations and schedule their sessions.
You should test with at least four participants per user group who will interact with your materials (e.g., four regular service users, four new service users, etc.).
Full usability tests can be conducted with anywhere between eight and 100 participants. Most of these usability tests include 8-20 participants in individual sessions that last between 30 and 90 minutes. Most will be about an hour long.
Depending on your resources, you may choose to incentivize participation (e.g., DHS or Component stickers or other promotional items), especially if each test is a long session of 30 minutes or more.
What You’ll Need
- A moderator
- A helper/note taker
- A complete copy of the material to be tested
- Name badges
- Test materials (see below)
In some instances, additional observers may also be included in the testing room. Or, you can use a webcam to have stakeholders observe from another room.
Test Materials
To run this test, you’ll need to download the test materials:
Download the Testing in the Conference Room materials (.zip file, 199KB)
Where to Do it
Find a quiet place for testing (like a conference room) that will allow you to have substantial, uninterrupted conversations with each participant. If your test includes observers, make sure there’s room for everyone. Alternatively, you can also schedule sessions in a usability lab (two rooms divided by a glass panel to keep participants and observers separate).
How to Do It
- Recruiting – Recruit your participants in advance. Schedule each session for between 30 and 45 minutes to give you enough time to conduct the test, jot down notes, and get ready for the next participant. We recommend having at least a half-hour break between sessions.
- Setting up – Get to your testing location early to set up. Using the test materials, you’ll have a number of different forms to keep track of. Having them laid out prior to testing will ensure a smooth session. Make sure to use the moderator’s guide and note taking guide provided so that questions and answers can be systematically recorded.
- Testing – First, have each participant complete the consent form. You can have them fill out the demographic questionnaire before or after the test. Following your moderator’s guide, carefully observe how each participant interacts with the testing material as well as any comments/gestures they make during the process.
- After the test – Thank them for their time and give them a copy of the “Thank You” card on the way out.
- Reporting – Using the report template provided, compile your results into a report, highlighting all stages of the usability test (i.e., participant data, testing locations, material tested, findings, and recommendations).
Use this approach if you need to engage with users who can't physically be in a room with the moderator and note taker. A full usability test can happen at any stage in the process, from testing the original version, to testing drafts, or testing the almost-final version. This approach may or may not result in a formal report.
Who to Test With
For this test, select participants who represent the intended audience for the material being tested. Screen them through phone conversations and schedule their sessions. Prior to the test, agree on the videoconferencing platform that can be accessed by all test participants.
You should test with at least four participants per user group who will interact with your materials (e.g., four immigration applicants, four travelers by plane, etc.). Since these users are remote, their sessions will be conducted individually. Full usability tests can be conducted with anywhere between eight and 100 participants. Most of these usability tests include 8-20 participants in individual sessions that last between 30 and 90 minutes. Most will be about an hour long.
Depending on your resources, you may choose to incentivize participation (e.g., DHS or Component stickers or other promotional items), especially if each test is a long session of 30 minutes or more.
What You’ll Need
- A moderator
- A helper/note taker
- An email with the material to be tested provided through links or attachments
- Test materials (see below)
- A laptop with a web camera and microphone
- A reliable internet connection
In some instances, additional observers may also be included in the videoconference. Prior to testing, ensure the following is provided to the remote participants:
- Calendar invitation with a link to the digital meeting room
- A reminder to test the link and ensure it is working prior to joining the session
- A reminder to join 10 minutes early to allow for video, audio, and internet connection troubleshooting
Test Materials
To run this test, you’ll need to download the test materials:
Download the Testing by Videoconference materials (.zip file, 117KB)
Where to Do It
Find a quiet place for testing (like a conference room) that will allow you to have substantial, uninterrupted conversations with each participant. If your test includes observers, make sure there’s room for everyone.
How to Do It
- Recruiting – Recruit your participants in advance. Schedule each session for between 30 and 45 minutes to give you enough time to conduct the test, jot down notes, and get ready for the next participant. We recommend having at least a half-hour break between sessions.
- Setting up – Get to your testing location early to set up. Using the test materials, you’ll have a number of different forms to keep track of. Having them laid out prior to testing will ensure a smooth session. Make sure to use the moderator’s guide and note taking guide provided so that questions and answers can be systematically recorded.
- Testing – First, have each participant complete the consent form. You can have them fill out the demographic questionnaire before or after the test. Following your moderator’s guide, carefully observe how each participant interacts with the testing material as well as any comments/gestures they make during the process.
- A note on remote presenting – It is best to display the material on your screen using the screen sharing function, pass control to the user, and then allow the user to digitally fill out the information through the screen sharing functionality.
- After the test – Thank them for their time and email them a copy of the “Thank You” card.
- Reporting – Using the report template provided, compile your results into a report, highlighting all stages of the usability test (i.e., participant data, testing locations, material tested, findings, and recommendations).
No matter which approach you take, a usability test will give you important information about how real users interact with your materials, helping you to make informed decisions about how to update or fix issues before you launch the materials out into the world.
You can think of each test as a step toward providing a more effective and equitable service!
Source: ElectionTools.org